If your blog is primarily text based with multiple headings, a table of contents is essential. It allows readers to have an idea of what to expect and also the ability to jump to the section that they are interested in rather than scroll through the whole thing searching for it.
Ideally, this table of contents should be automatically generated as creating them manually can be quite repetitive.
There are pros and cons of generating it on the client side. The benefit is that users only have to download the script once and generate table of contents for all pages rather than having to download a different table of contents for each page.
In this post, I will show you how to add a third party javascript table of contents (ToC) auto generation library to Blogger.
Note that you might have to customize the code a little bit, so you'll need to have the basic knowledge of HTML, CSS, and JavaScript.
Tocbot
Tocbot is a handy library that can generate table of contents based on the settings you set, so it is somewhat flexible. Although its default settings should be enough for most cases. It also comes with a default styling and animated scrolling and highlighting when you jump to different sections of the article. For a demo, head over to their examples section to see some examples.
Automatic Heading IDs
One thing most table of contents needs is an url with a
And again, ideally, this ID should be generated automatically, because who wants to manually go assign IDs when they are writing a post.
To facilitate this ID generation, we are going to add a little script to the
 In the Theme menu of Blogger, click on Edit HTML button. This will allow
you to edit the HTML code of the template of the theme you are using.
In the Theme menu of Blogger, click on Edit HTML button. This will allow
you to edit the HTML code of the template of the theme you are using.
 Paste the following code in between

 In the Layout menu of Blogger, click the Add a Gadget button and choose the HTML/JavaScript gadget. Or, if you already have a javascript gadget and prefer to use the existing one, open the existing gadget for editing.
 In the editing interface of the javascript gadget, make sure the gadget is set to visible, give it a title, and in the content section paste the following code between
The code inside
One benefit of using hosted files is that users who visited another site that use the same hosted files would already have those files in cache and won't have to download them again when they visit your site.
In the Theme menu of Blogger, click on Edit HTML button. This will allow you to edit the HTML code of the template of the theme you are using.
 In the
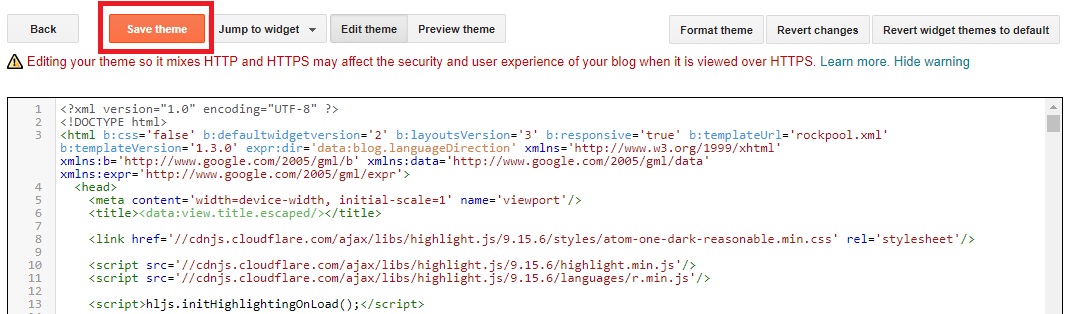 Save the theme HTML.
Inside the function where the three dots are, there should be a section of code of
You can customize these options to fit your blogger theme. A full list of options can be found here.
# portion denotes the section of the page to jump to. This requires that the HTML element you are jumping to has an id attribute assigned. In this case, we are jumping to different headings in our posts, so we need to assign IDs to each heading.And again, ideally, this ID should be generated automatically, because who wants to manually go assign IDs when they are writing a post.
To facilitate this ID generation, we are going to add a little script to the
head section of our HTML that allows us to detect when the HTML is fully loaded. Then we are going to add another script to the Javascript gadget to say that if / when HTML is fully loaded, generate IDs for each heading element. I use the gadget because I don't want to open the full HTML to just edit the scripts.Edit HTML
Paste Code - Theme HTML
<script></script> tags in the head section:
let domCttLded = false;

document.addEventListener('DOMContentLoaded', function(evt) {
  domCttLded = true;
});
Custom Gadget
Paste Code - Custom Gadget
<script></script> tags (create the tags if you don't already have them):
function ifDomCttLded(fct) {
  if (domCttLded) {
    fct();
  } else {
    document.addEventListener('DOMContentLoaded', fct);
  }
};

ifDomCttLded(function() {
  //auto set heading ids
  let content = document.querySelector('.entry-content');

  if (content) {
    let headings = content.querySelectorAll('h1, h2, h3, h4, h5, h6, h7');
    let headingMap = {};

    Array.prototype.forEach.call(headings, function (heading) {
      let id = heading.id ? heading.id : heading.textContent.trim().toLowerCase().split(' ').join('-').replace(/[\!\@\#\$\%\^\&\*\(\)\:]/ig, '');

      headingMap[id] = !isNaN(headingMap[id]) ? ++headingMap[id] : 0;

      if (headingMap[id]) {
        heading.id = id + '-' + headingMap[id];
      } else {
        heading.id = id;
      }
    });
  }
});entry-content class. This is important to understand, because you'll need to make sure either all your post containers (the element that contains your post headings) has the entry-content class, or you'll have to change entry-content in the above code to a class that your post containers do have.The code inside
ifDomCttLded(function() {
  ...
});Installing Tocbot
Now that our headings have IDs assigned. We can start working on generating the ToC. To do that, we'll first install the Tocbot javascript and css. On the Tocbot installation section, there is a detailed guide for multiple methods to install Tocbot. For convenience, I just used their hosted files. So that's the method I'll be showing you.One benefit of using hosted files is that users who visited another site that use the same hosted files would already have those files in cache and won't have to download them again when they visit your site.
Edit HTML
Linking Tocbot Files
head section of the HTML, insert the following code:
<link href='https://cdnjs.cloudflare.com/ajax/libs/tocbot/4.4.2/tocbot.css' rel='stylesheet'/>

<script src='https://cdnjs.cloudflare.com/ajax/libs/tocbot/4.4.2/tocbot.min.js'/></script>Saving Theme
Installing Tocbot Initialization Script
Remember theifDomCttLded(function() {
...
});Inside the function where the three dots are, there should be a section of code of
if (content) {
  ...
}//init toc bot
tocbot.init({
// Where to render the table of contents.
tocSelector: '.toc-cnr',
// Where to grab the headings to build the table of contents.
contentSelector: '.entry-content',
// Which headings to grab inside of the contentSelector element.
headingSelector: 'h1, h2, h3, h4',
});toc-cnr and a headings container element with the class entry-content and generate ToC for all heading 1 to heading 4 elements.You can customize these options to fit your blogger theme. A full list of options can be found here.
Hello, please how can I make this TOC appear in mobile
ReplyDeleteSo the table of content is generated inside an html element with a class that you specify in the settings "tocSelector".
DeleteIn my example, I have set this class to "toc-cnr".
You need an html element that is visible on mobile to have the same class that you specified here.